

")
")

How Hardness Testing (HT) Works

hardness test according to Vickers
Hardness testing determines the resistance of a material against the penetration of a test body or against plastic deformation. It correlates with strength and wear behavior and is therefore a central quality characteristic in production and maintenance.
-
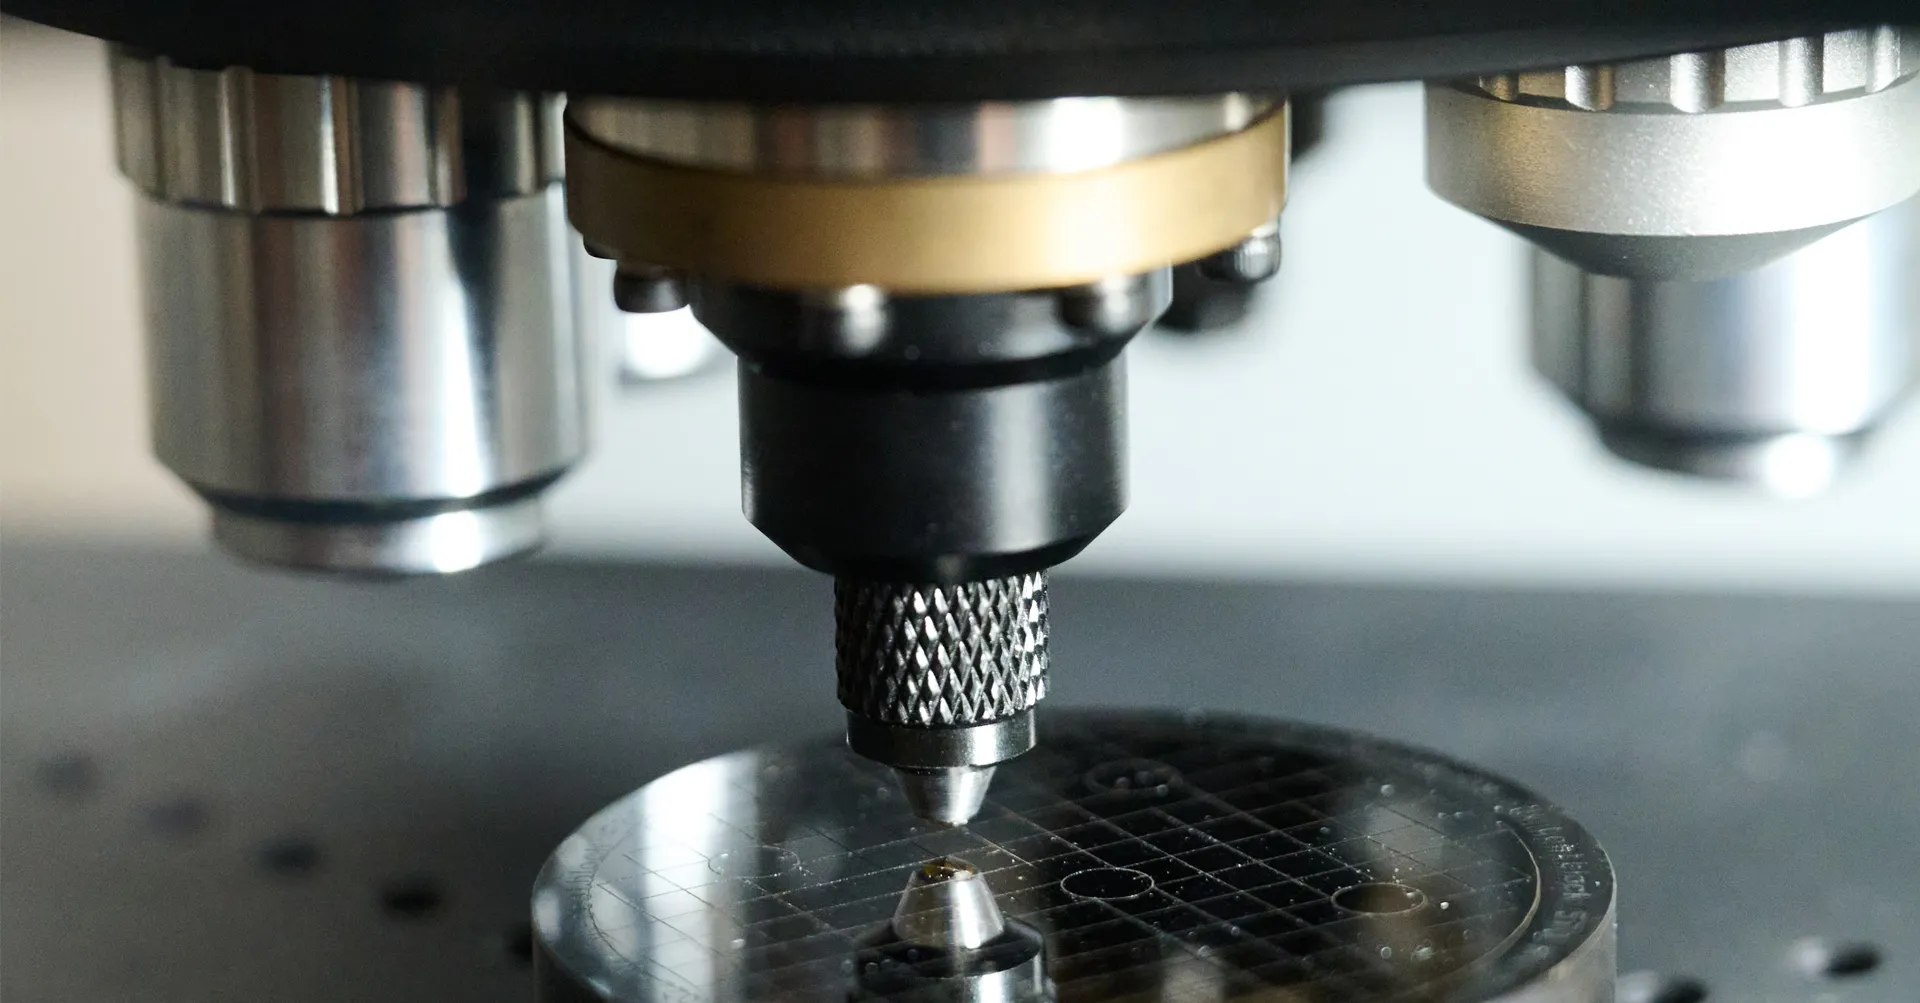
Step 1 – Sample Preparation
Clean the surface and – depending on the method – grind/polish flat. For mobile methods (Leeb/UCI), a metallically bright, load-bearing surface is usually sufficient.
-
Step 2 – Indenter / Test Force
Depending on the standard, diamond pyramid (Vickers), diamond cone or ball (Rockwell) or carbide/steel ball (Brinell) are used. The test force is applied according to the standard.
-
Step 3 – Impression Measurement
Measurement of diagonals (Vickers), impression diameter (Brinell) or permanent penetration depth (Rockwell). For Leeb, the rebound velocity is measured; for UCI, the frequency shift of a vibrating rod.
-
Step 4 – Evaluation & Documentation
Calculation of hardness value (HV, HBW, HRC/HRB, HL) and creation of a standardized test report including measurement location. Optional: hardness profile diagrams and limit value assessment.
- Vickers (HV) – DIN EN ISO 6507-1, universal from very soft to very hard, small test areas and layers
- Brinell (HBW) – DIN EN ISO 6506-1, ideal for coarse-grained/softer materials, castings and non-ferrous metals
- Heat treatment verification (SHD/RHT, Nht)
- Weld seam and HAZ evaluation
- Incoming goods and production control
- Hardness profile tests on surface layers
- On-site component testing (turbines, shafts, molds, gear parts)
We advise you on the selection of the suitable method and provide reliable results for your quality assurance – fast, transparent and accredited.